When I talk to entry-level photographers, the conversations almost always turn to something about gear. And while these conversations somewhat irk me now, there was a time when I was exactly the same. A time when I felt the tools that I had were what held me back the most.
In some ways, entry-level gear can hold you back. But, at least when it comes to landscape photography, there are steps you can take to easily get professional level photographs with entry-level cameras.
First, we need to look at what the real difference between an entry-level camera and a professional level camera really is. And from there, I’ll teach you how to overcome the gear challenge and take better photographs. And, along the way, I’ll give a couple of cheap lens recommendations to get you started.
What separates a professional camera from an entry-level camera?
There are a few key differences between beginner and pro cameras. But the problems that you’ll have in entry-level gear are actually very easy to overcome in our modern age. Having programs like Lightroom and Photoshop, photographers can now get way better results, way faster than we ever could in the darkroom. And to boot, we can take unlimited images without having to pay to develop and scan them.
The real differences come down to a couple of categories: megapixels, sensor size, and ISO performance.
Megapixels are the number of light-sensitive diodes across a sensor, known as pixels. A 10-megapixel camera produces an image with 10-million dots of light. More megapixels typically results in more detailed images, capable of being printed at larger sizes.
Sensor size is literally just the size of the sensor. Larger sensors gather more light, can have more megapixels and are capable of exhibiting more bokeh, or the effect of blurring the background.
Iso performance is how well the camera sensor handles noise at higher levels. Typically sensors become twice as good at capturing light every 10 years. Entry-level cameras typically have larger, and more modern sensors that handle ISO noise better. ISO 3200 on a Nikon D850 will show significantly less noise than on a D7200.
These are the main differences, and all of them can be overcome with a bit of knowledge and patience. Every other difference between pro and entry-level gear simply comes down to additional features, buttons, processors, and software inside the camera.
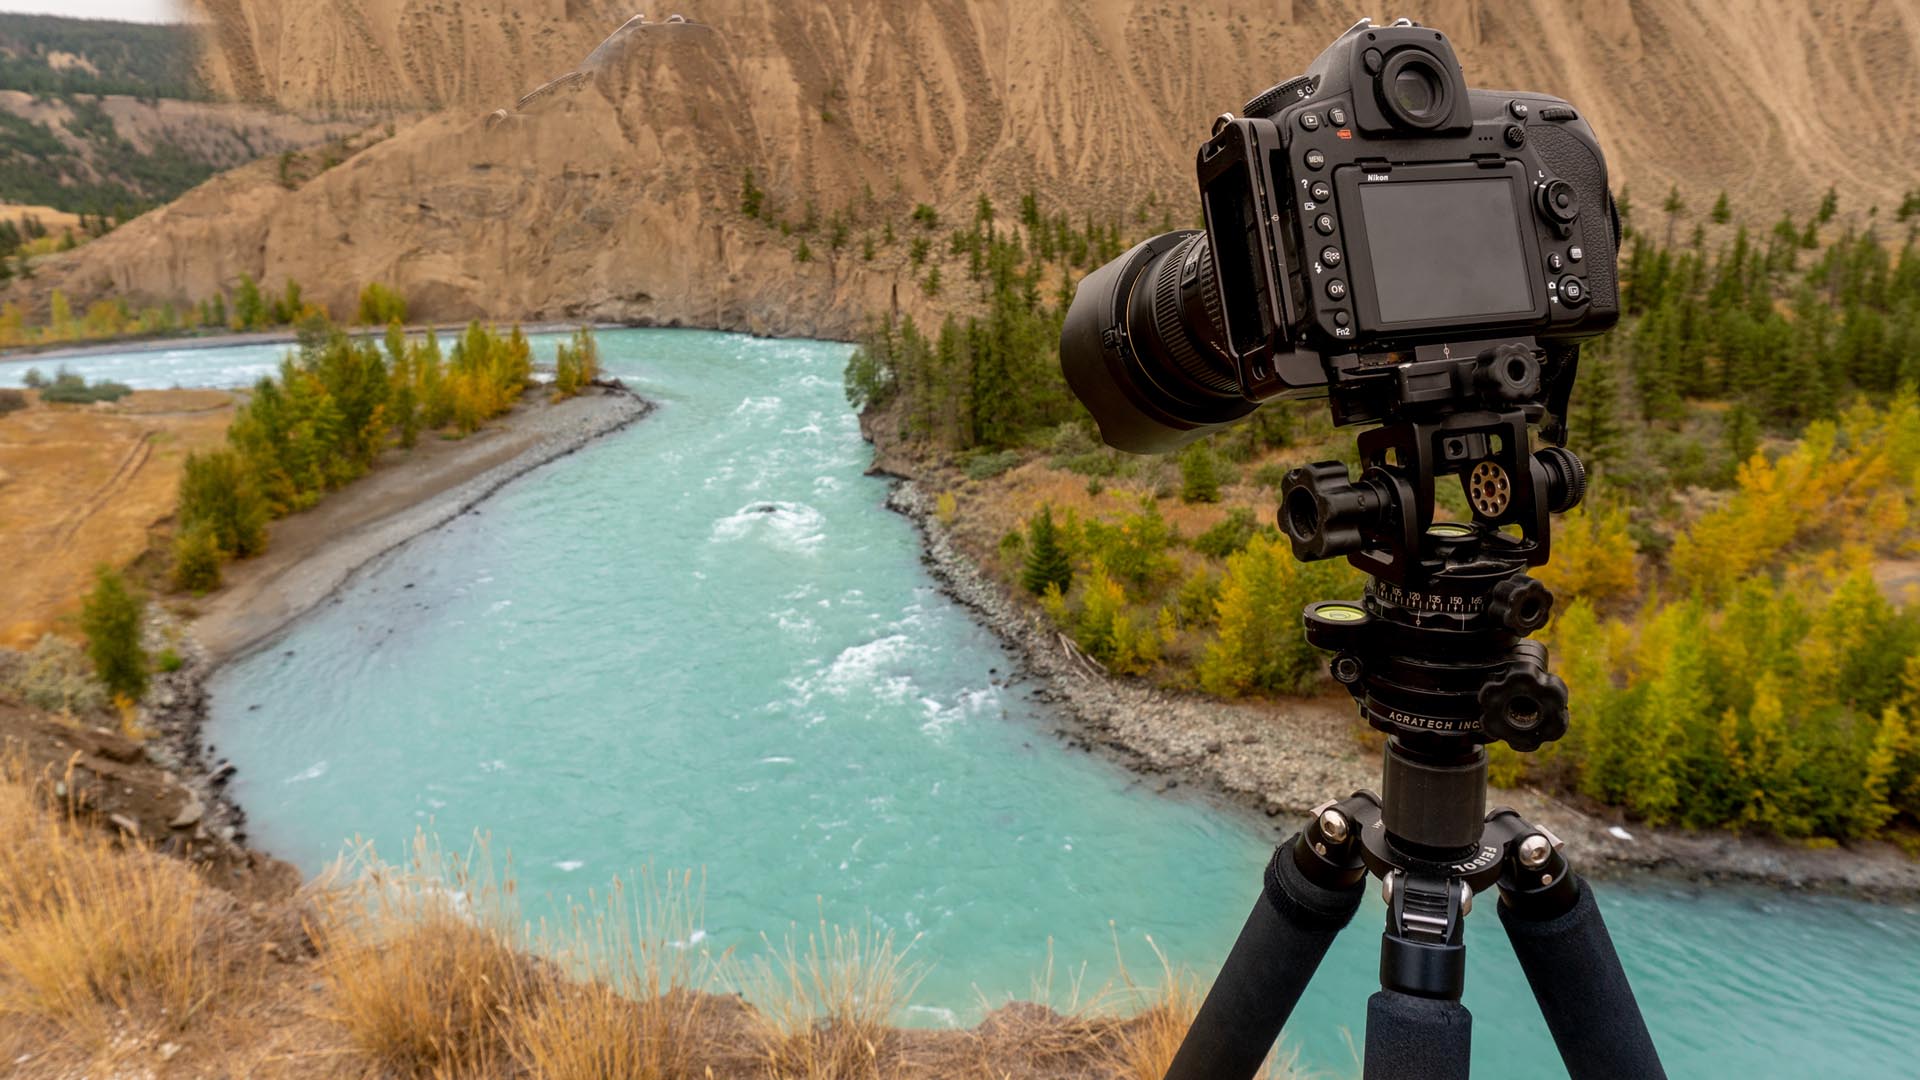
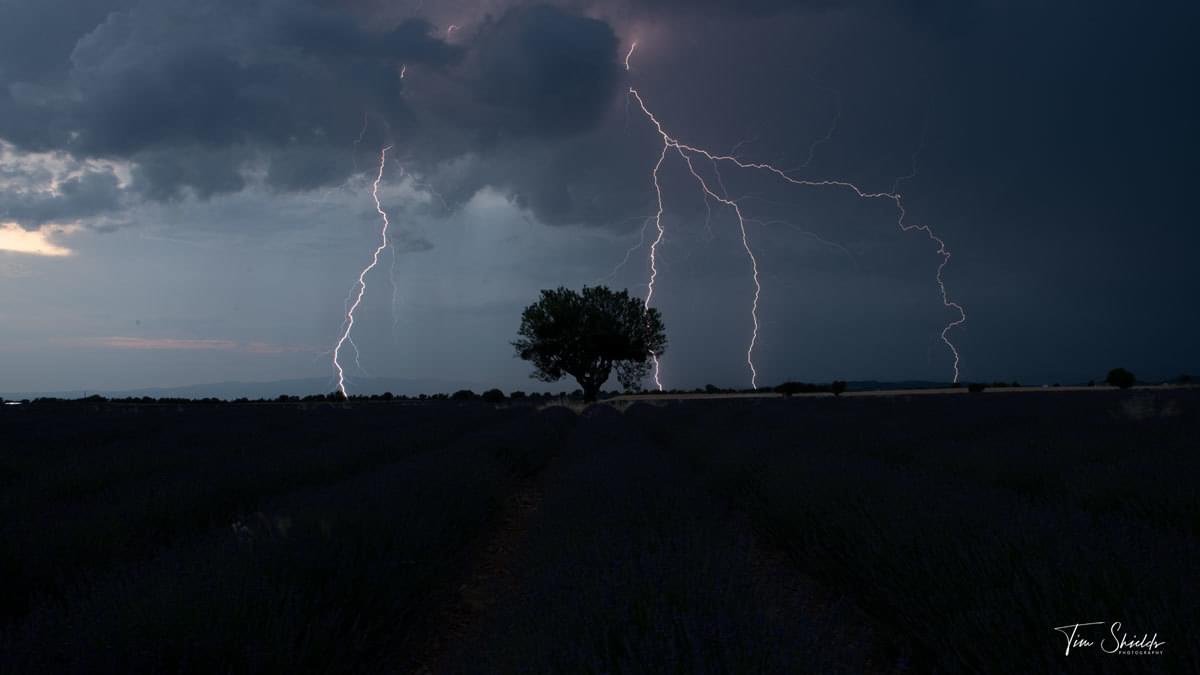
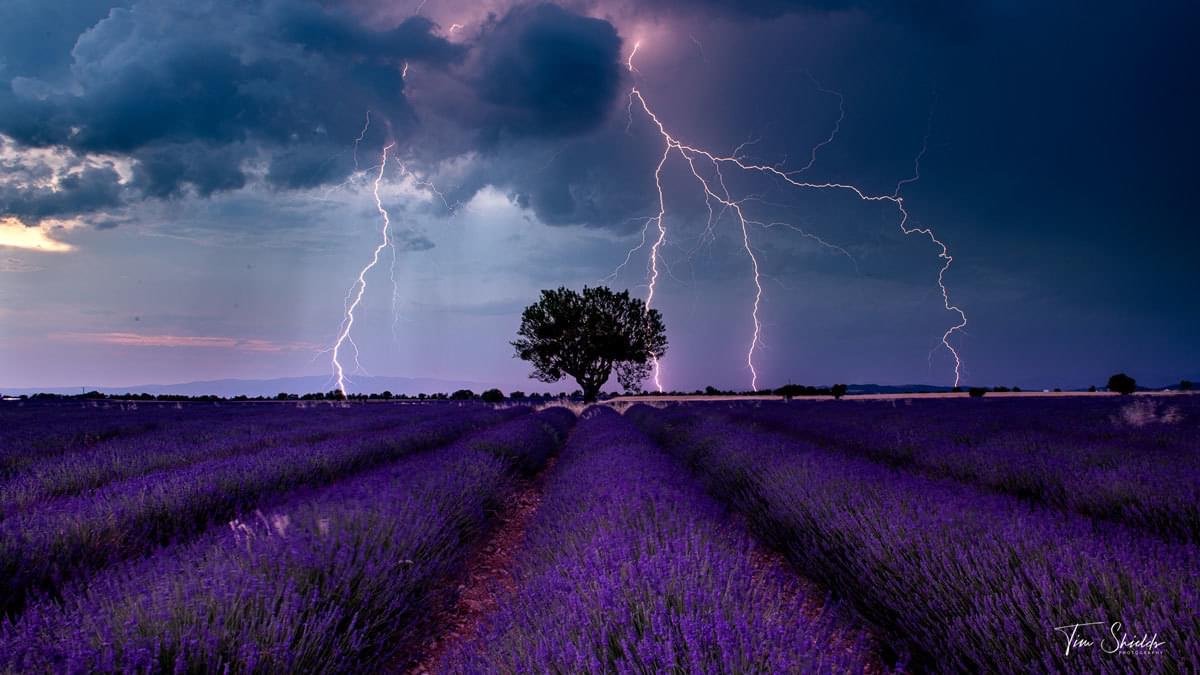
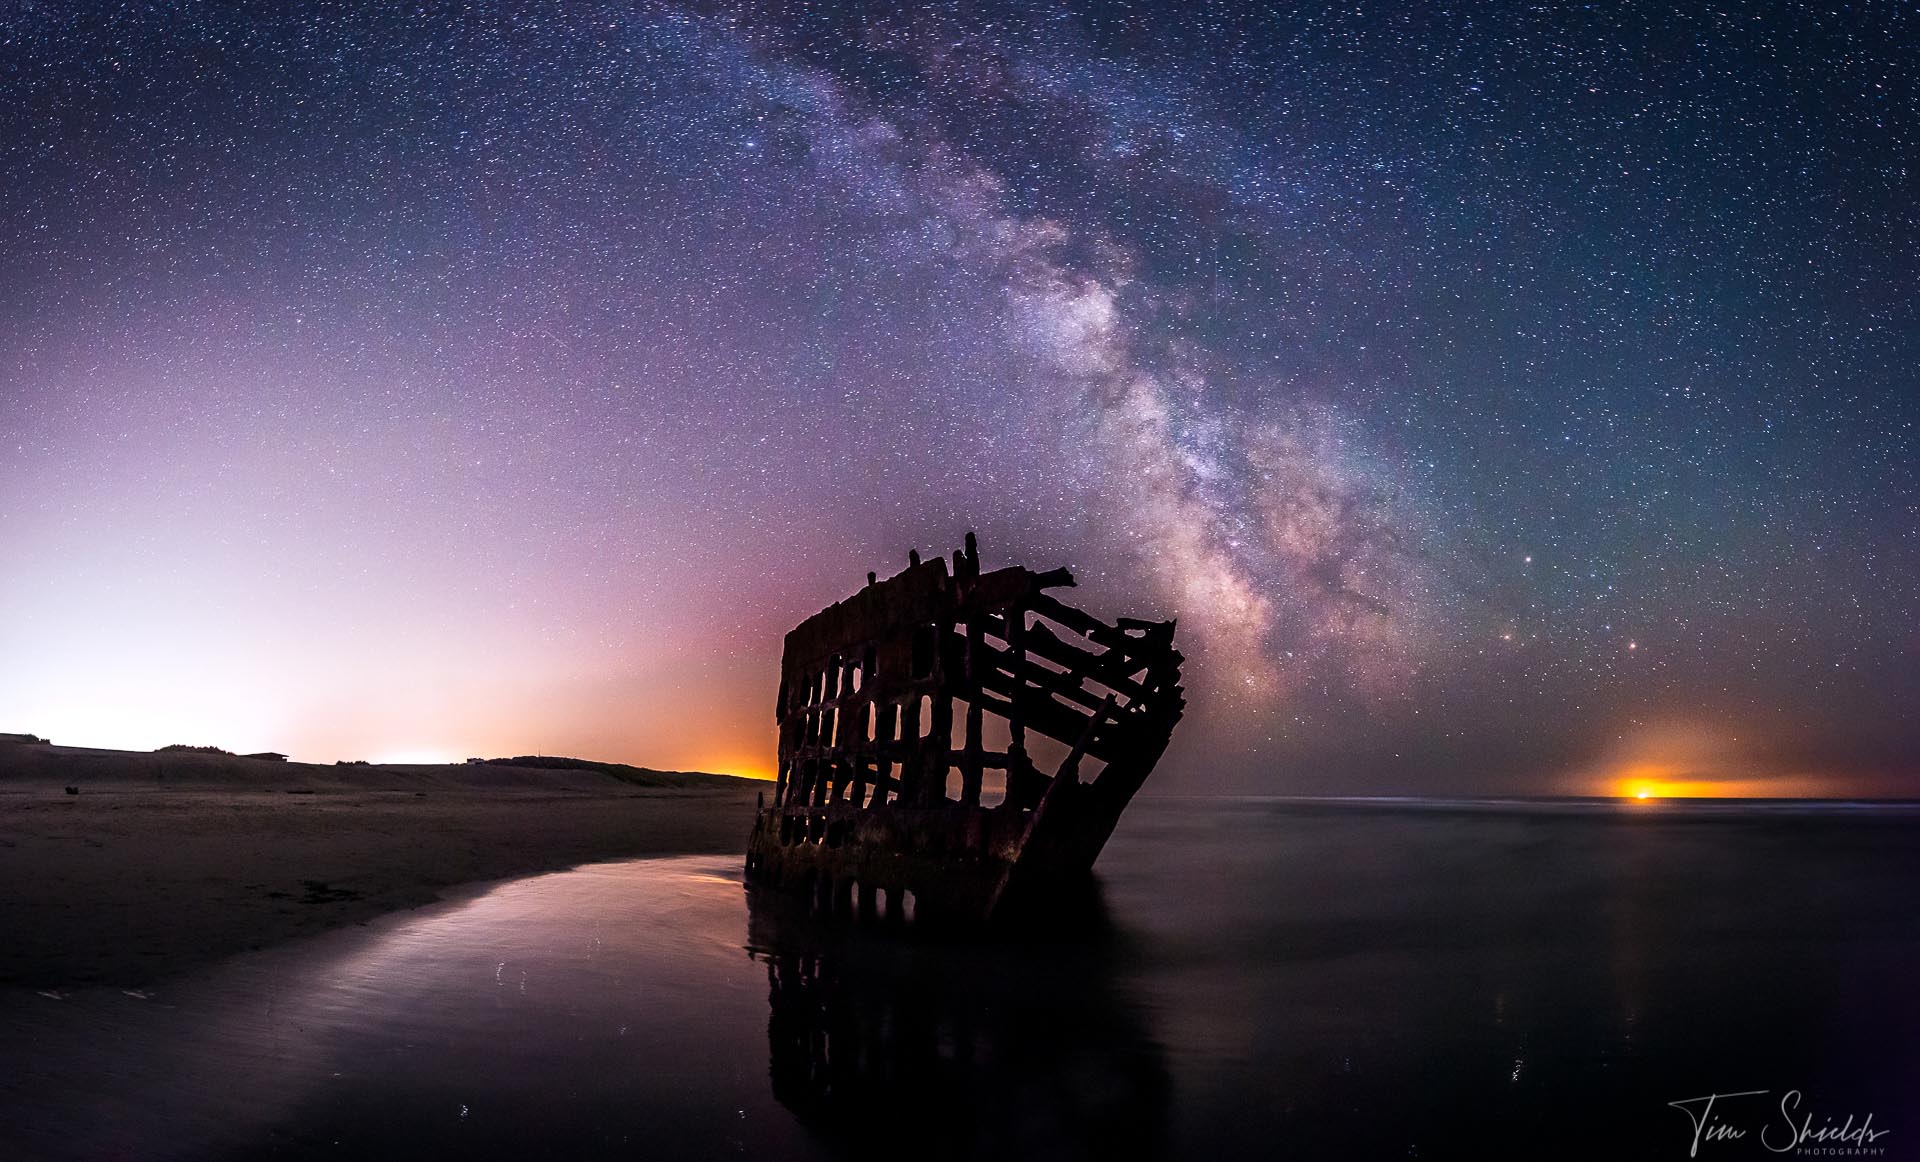
1. Use a Tripod to overcome poor ISO performance and smaller sensors
Tripods are far and away the most useful piece of equipment for a landscape photographer. When you don’t have to worry about shutter speed, you can use the lowest possible ISO value and the best aperture for the situation.
This is why I’m constantly telling photographers to use a tripod. They’re bulky, heavy, expensive, and generally a pain in the ass when you’re climbing a mountain. But when you start using it, it’ll very quickly become the most important tool in your kit. For this reason, I never suggest buying a cheap tripod. A cheap, flimsy, entry-level tripod is more likely to get in the way and ruin your photos. In fact, they’re the same tool that is necessary for the other techniques, too.
When you start using a tripod and slower shutter speeds, it’s important to set up a 2-second, or 10-second timer so that you don’t touch the camera to release the shutter. Even just pressing that button can introduce a sharpness-reducing shake. And if you don’t have the patience for the release, you can always purchase a cheap remote shutter release.
Find the tripod head I use and recommend on B&H here. Or learn how to choose the tripod that is right for you in this helpful article that I created after years of experience trying out different tripods.

2. Try HDR Photography
HDR Photography is a great way to get professional results with an entry-level camera. This works by combining multiple photos together to increase the amount of color detail in an image. But it has an additional effect of reducing the overall noise, and increasing sharpness.
A professional-level camera will have the ability to do exposure bracketing, which is exactly for this purpose. This is one of the main options and is usually displayed on the back of the camera when not in live view. The setting looks the same as the exposure bar in the viewfinder that tells you if your image is over, or underexposed. For exposure bracketing, when you select this option and move your shutter wheel to the left it will expand two lines, one on the left, and one on the right. Moving the lines further away will increase the difference in the exposures between photographs.
Once you set this, put your camera on a tripod, and the next photographs will be taken at different shutter speeds. The first one at the regular shutter speed, the next one underexposed, and the third one overexposed. Then you’ll be able to combine these photos in Lightroom or Photoshop to create an image with more detail and dynamic range than your camera will be able to take in a single shot.
If you don’t have exposure bracketing, you can incrementally change the shutter speed in manual mode to under and overexpose your image. This works exactly the same as a professional camera with the bracketing setting would, it just means you’ll need a slightly more hands-on approach.
One tip is to always make sure the camera is perfectly still between exposures. If the camera moves, combining them in Lightroom might create ghosting or other weird effects.

3. Create a Panorama
This one is really cool. When you know how to do a proper panorama, you can get much better results than a pro camera ever could. Panoramas are made by putting the camera on a tripod, and then panning and tilting the camera with each shot to get a larger image. Cellphones can do this as well by slowly scrolling across a scene. But with a DSLR, you have complete control.
Combining just four photos with a crop sensor will give you a medium format look. Increase this to 9, and you’ll be creating a bigger image than even large-format cameras. The results can be absolutely incredible. And if you have a good foreground interest and a long-focal length lens, this technique can also produce some amazing bokeh.
To get started with this, you absolutely need a tripod with a pan and tilt head. Using a ball head tripod will cause some problems and cause you to miss some shots. Set up your composition, and move your camera to the middle of the frame. Then, move the camera left or right, ensuring that you have at least 20% of the detail from the last shot. Once you have all the details left to right, then you can tilt the camera up or down (including 20% of the above photo) and repeat the process.
Once you have the photos in Lightroom, simply right click the image, scroll down to merge photos, and click create panorama. And with this, Lightroom does all of the heavy lifting for you, creating a tif file that’s just as editable as Raw formats.
4. Learn how to use presets
I’ve said this before and I’ll say it again. Presets are for pros. Every professional I know uses presets that they’ve bought or made themselves. Once you start building your own photo style, presets will be your best friend in making sure that you can get that same look every time.
Even photos from a cheap, entry-level camera can create stunning results with well-developed presets. This is because they’re designed to give your photos a stunning, and unique contrast. All cameras are designed to create flat and boring Raw images so that the user has the maximum amount of control in post-processing. But there are thousands of combinations possible in Lightroom, and learning all of the settings takes years of steady practice and experimentation.
For this reason, purchasing presets can be a really cheap investment that allows you to experiment with combinations that are already proven to work. Then, you can tweak the settings how you like, and create some styles of your own. I’ve created my own preset pack, here.
What lenses do you recommend for a new photographer?
This is the big question. Cameras are all quite similar, but at the end of the day, it’s the lens that makes the biggest difference in the image quality. You can have the best camera with the biggest sensor and best ISO performance in the world, but if your lens can’t resolve the detail, the images are just not going to look good.
To start out, I always recommend looking at prime lenses. These are lenses that don’t zoom, but have large apertures, are lower cost, and are exceptionally sharp.
The kit lens is designed to be good for every type of photography, but great at absolutely none of it. It helps you get your feet wet and pushes you to buy something better down the line. Typically, my first recommendation is to put the kit lens aside and go for cheaper prime lenses. For landscape photography, you can pick up a Samyang 24mm f1.4 for around $400. It doesn’t have autofocus, but it’s perfectly capable for landscapes and astrophotography. If you’re not photographing sports, kids, or pets, this kind of lens is a great addition to any landscape kit.
The next best lens for beginner photographers is the 50mm f1.8, or the nifty fifty. This lens usually sells for $250 or less depending on the manufacturer. And it’s by far the best purchase that I ever made. This was the first lens that really gave me stunning, professional results. Because of that large aperture, even with a crop sensor camera, it’s capable of producing beautiful bokeh. And because it’s prime, it’s tack sharp throughout.
How else can I get better photos without upgrading my gear?
 The best photos are never about the gear. Put a cheap camera in a professional photographer’s hands, and they’ll come away with something amazing every time. And one of the biggest reasons is planning. I talk about how to plan, and take fantastic photos in my free online web class! Sign up today to learn the simple four-step system that I use every day to take award-winning fine-art landscape photographs.