Getting outdoors in the winter takes a special kind of photographer. The best spots are all closed down or require a set of cross country skis or snowshoes to access. And if you’re waiting until the sunset, hiking back home in the dark can be absolutely treacherous if you’re not prepared.
But for those seeking a thrill, backpacking in the winter can be a dream. There are winter landscapes out there that are nothing short of spectacular. And competition is so much lower because of the additional difficulties. I personally love winter photography because of the extra contrast in the scenes. Especially out here in the Pacific Northwest, there are all kinds of miraculous compositions to be had in the winter.
But what makes these photos so interesting compared with summer photos? Everyone loves the beauty that a fresh layer of snow brings. And that’s because of the extra contrast that snow brings to a scene. The best winter scenes require some planning in advance, because there’s nothing worse than searching hours in brutally cold weather for a composition that isn’t there.

1. Look for contrast in winter scenes
The snow provides a lot of contrast that isn’t available in the summer. Since the white snow reflects light from the sky, you’ll have to think about scenes differently. This will mean that the subject of your scene will most likely be in the shadows. Look for scenes where the shadows can create leading lines or points of interest in the scene.
The next step is to look for color contrast. Many people love to see blue water in the winter. And this is going to be a challenge to find because in most places, the water will already be frozen over. In this case, you may have to plan months, or even a year in advance, and be ready to drive or fly to that perfect location at a moment’s notice.
After the lakes freeze over, there may be some waterfalls that are still rushing, as kinetic energy keeps the water warm. And the last bet is hot springs, or the ocean, which will never freeze because of warm currents and salt content. In northern areas like British Columbia, there are endless winter scenes where the fluffy snow meets the oceans for absolutely astounding scenes.
Search for these types of scenes on Instagram, and you’re bound to find something that’s both accessible and interesting. But if you want to get into adventure photography, and finding scenes that nobody else has ever photographed, the tips below are for you.

2. Buy a pair of snowshoes
Snowshoes are one of the most underrated pieces of winter gear. They’re dirt cheap, and they open up so many scenes that are otherwise inaccessible. Skis in comparison are heavy, and difficult when you’re climbing uphill. But snowshoes will go anywhere you need them to take you. As well, they typically have ice cleats built in so that you’ll have traction in any landscape.
But these do require practice. Don’t think you can just buy a pair of snowshoes, and go do an 8-hour hike up the side of a mountain. For one, you’ll probably run out of light on the way down. And two, going up is way easier than coming down. Start by trying them with scenes that are close to the parking lot. This way if you fall and get wet, at least you’re close to your vehicle and others to help out.
But once you get used to them, snowshoes will unlock scenes where the deep snow would make traveling impossible. They’re an absolute joy to use and are one of the best purchases I’ve ever made.

3. Essential gear for keeping warm, dry, and safe
Over the years of photographing outdoors in the winter, I’ve learned many of the most useful items for keeping warm and dry. You need clothing that not only keeps the snow out but keeps you dry as well. And often, the best clothing and accessories are made from wool. I have a wool sweater, wool gloves, toque, scarf, socks, and thermal wool underwear that all keep me completely warm and dry in the winter. The reason for this is that wool dries out extremely quickly. So it’s always warm, even if you take a tumble or two.
My gloves have a magnetic latch that lets the tips of my thumb and index finger through. This allows me to easily use my camera while they’re still on. As when you’re out in the cold, the last thing you’ll want to do is take off your gloves. I also always keep some hand warmers in my bag. Just in case it gets cold, these cheap little sachets are perfect for keeping your hands and feet toasty. Comfort is everything. If you’re not comfortable, you’re not going to stay out.
You’ll also need a jacket with a waterproof shell, waterproof pants, and boots to make sure that nothing seeps in. Getting snow in your boots can be the end of a good hike. So make sure your snow pants are well wrapped around your boots.
Another tool that I’ll never leave behind is an external battery pack. Lithium-Ion batteries lose charge fast in the cold. So you’ll need to keep your phone and an extra battery back inside your jacket just in case.

4. Acclimatizing your equipment
Taking your gear from hot to cold can allow water to get inside. The water inside your camera can spell its death, and water inside the lenses can cause them to grow mold over time. So you need to be sure to always keep your gear as dry as possible. There are plenty of videos out there about people saving their cameras after being completely iced over. So if it happens, you’ll be okay. But you will need to take care.
For your camera gear, you’ll also need a waterproof backpack. Some come with a plastic layer that goes outside the bag, but I’ve often found these aren’t very effective. The added bonus of a thick, well-sealed waterproof bag is that they allow your gear to acclimatize. I can be outside in -15 for an hour, and the temperature inside my bag will still be warm from the car. Waterproofing does go away over time. So you’ll need to buy some waterproof spray to apply to the outside of your bag and boots every season.

And when you get home, bringing your cold equipment inside is where things get scary. The warm air will condense water onto your lens and camera if you’re not careful. I always keep my bag open to the air so that water evaporates back into the air. To add protection, I also use silica gel packs to absorb any extra water that comes off my equipment. If there’s a lot of condensation, I’ll use a large number of these silica packs around the lenses and camera body to ensure all the moisture is absorbed. You can buy packs of these on Amazon fairly cheaply, and also collect more over them over time as almost every piece of equipment comes with at least one sachet.
5. Know the weather conditions
This is the most important step. A sudden change in winter weather can spell disaster. If you’re not prepared for it, you might not make it home. Always be sure to get a detailed, hourly weather forecast before you leave.
There are free tools like Clear Outside for Android and iPhone that will give you an hourly forecast, including cloud conditions, wind, precipitation, and more. Of course, it’s not perfect, but it’s rarely let me down in the past. You can find a more detailed look at using this application in this article.
On my trips, I’m checking the weather every hour just in case the conditions are about to suddenly get worse. Knowing what’s coming can give you advanced warning to get back to safety before a sudden weather system blows in and ruins your trip. In case of the worst, make sure that you have cell phone coverage, and that your cellphone is tucked carefully in your inside pocket with an additional battery or external charger. If you know you’re going into the deep mountains or backcountry, a satellite phone is a must-have.

6. Profit
Getting outside in the winter is a uniquely rewarding experience. Not only will it keep you fit and healthy over the winter, but you’ll be able to get shots no one else can.
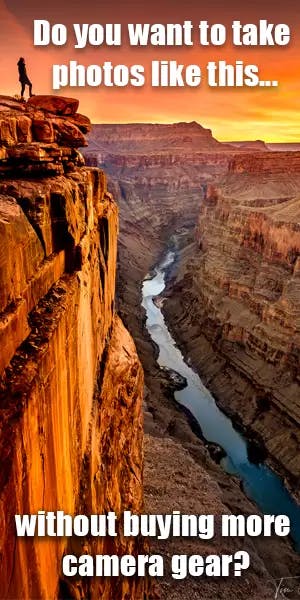
 And when you’re ready to take your photography to the next level, you can sign up for my free online web class! This course will teach you the four-step system I use to take all of my award-winning fine art landscape photographs. The best part is that there are tips for people at all levels, and it doesn’t require you to buy any additional equipment.