Plants expend a lot of energy to make flowers beautiful. They do it because there’s a major payoff at the end. Pollinators like bees and hummingbirds will spend extra time around the most interesting and attractive flowers. And this means the plant is more likely to reproduce.
And of course, the most beautiful flowers are grown again and again by humans and other animals that spread their seeds. As photographers, we’re often trying to capture their beauty and spread their likeness in our own way. It likely doesn’t benefit the flower, but their art does bring lasting joy to our homes.
But often snapping nice flower photos isn’t just about capturing the petals top down. Sometimes that makes for beautiful imagery, but most often, thinking outside the box will result in the best images. There are a few key factors to consider. The background, composition, lighting, and color theory.

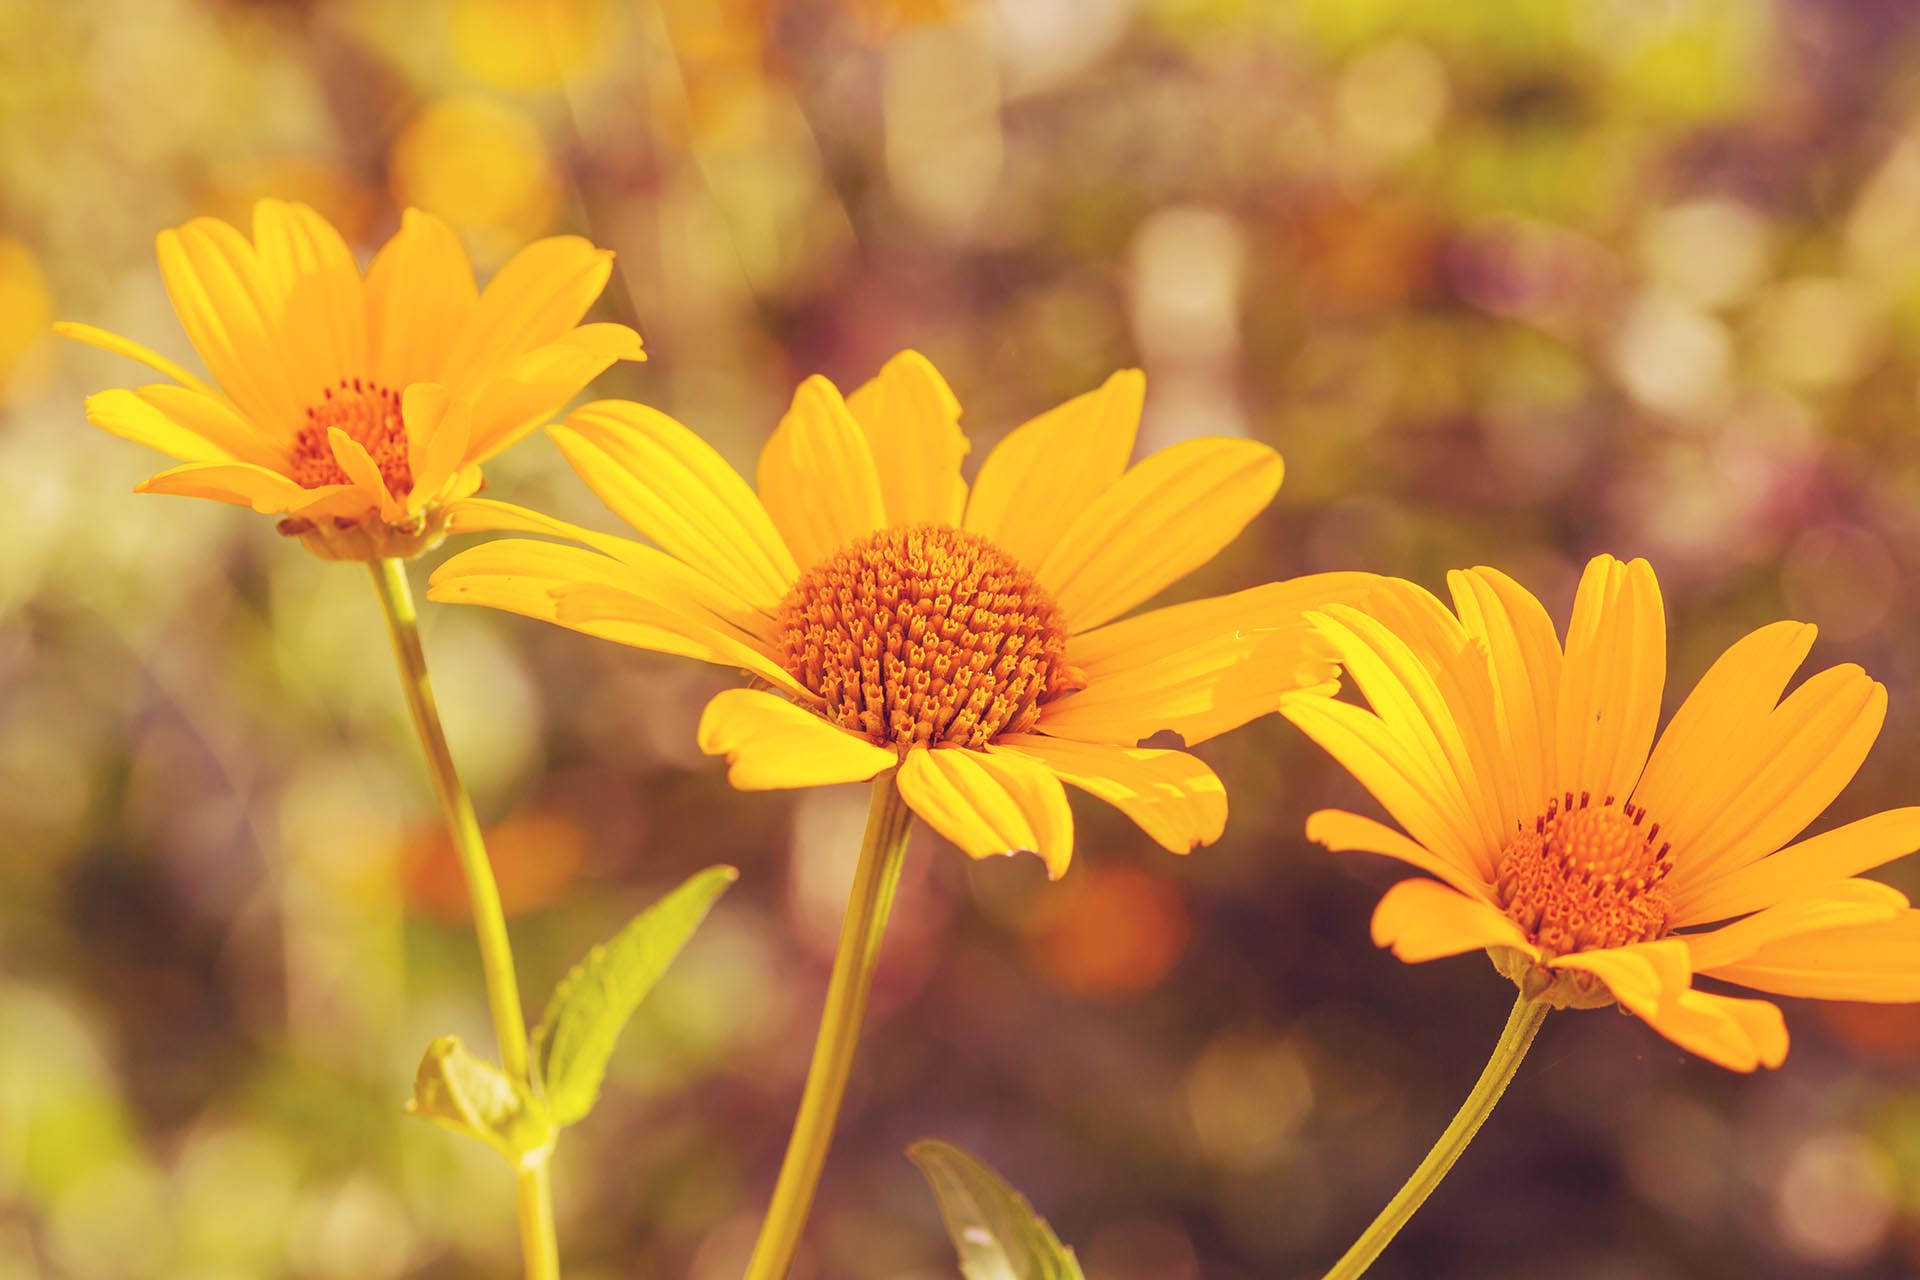
1. Use aperture to blur the background
Blurring the background will help to isolate the flower, and make it the hero of your image. Backgrounds in a flower image can be distracting, and take away from its natural beauty.
The easiest way to capture a flower with a blurry background is to get up close, and use as small of an aperture as your lens will allow. If you’re using a standard prime lens, the smallest aperture will usually be between f1.4 and f2.8.
Small apertures like these will completely remove the background, and all of the distracting villains with it. These clean images will make the flower stand out proud, the way they were meant to.

2. Using flowers as leading lines in a composition
This is one that I’m a huge fan of. I flew to France just so I could capture images of lavender fields. Places like Holland and France are famous for planting rows and rows of flowers to farm. And the results are just gorgeous and speak for themselves.
If you’re lucky enough to live in a region with flower farms, go and visit in the season they bloom. And then photograph the rows from the bottom up so they lead the viewer’s eye to a destination. If the flowers are going left to right, they can still make an interesting composition, but the best is always if there are lines leading to a destination.
Leading lines are powerful tools for keeping people’s eyes on your photograph for longer. And apps like Facebook and Instagram are always measuring the amount of time people spend on your photos to see if it’s high-quality content. If there aren’t flowers in your region, look for other crops that are grown in rows, like tomatoes, sunflowers, or corn.
If you’re photographing up close, you can use the stems to make leading lines as well. If the stems are leading up to a point in the background, be sure to close down the aperture so some of the background detail comes through.

3. Follow the light to make beautiful flower photographs

Light can make or break and photograph. But flowers are especially brilliant when there’s a bit of light to increase the contrast. If they’re in your home, put the flowers next to the widow for some gorgeous directional light. This will add light to the petals, but keep the stems and undersides darker.
The bright parts of an image draw the eye in since there are more details to be found there. But the dark sections are also very important because they bring the viewer’s eyes to the bright spots. I talk a lot more about photographing for contrast in this article here.
If you’re outdoors, photographing flowers at sunrise or sunset can be a brilliant way to add contrast. The warm light is directional, like window light, and is prized for the contrasty beauty it lends to photographs. Sunrise and sunset will also simplify the color palette in the image, which helps makes the flowers stand out. I’ll talk about this more in the next section.
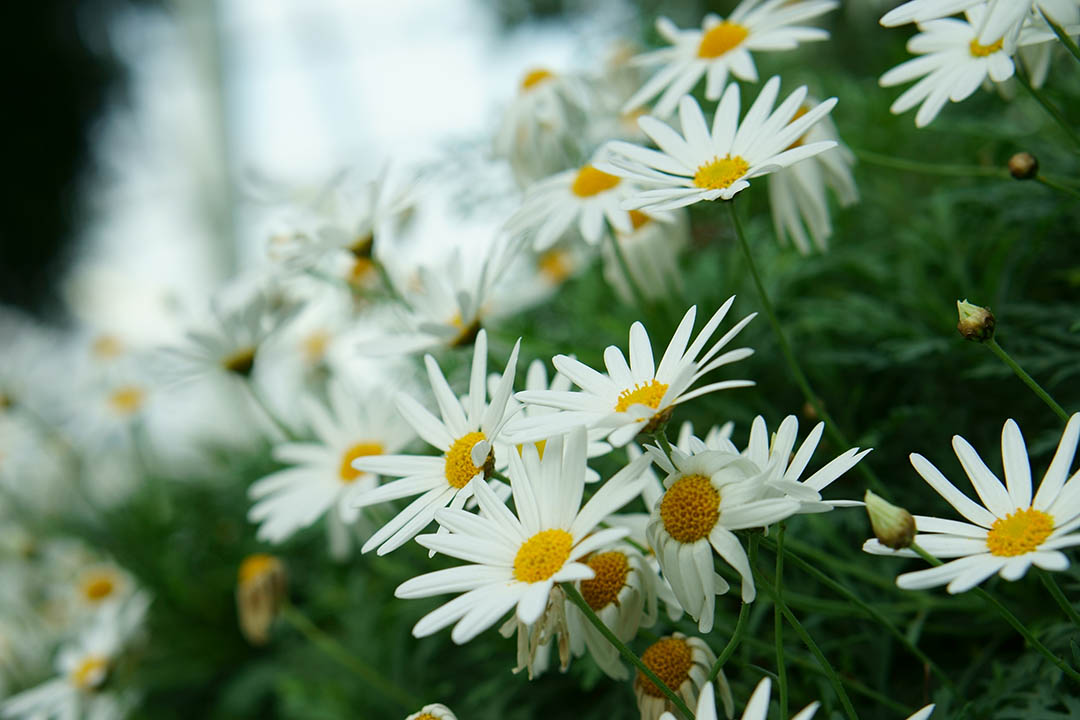
4. Think about Color Theory when photographing flowers
Nature understands color theory like no one else. Flowers are the some of only natural beings on earth that use such bright, contrasty, and vivid colors. And the reason for it is so that they can be found. Think about it, if all flowers were green, bees, and birds, which are attracted to color, would have a much harder time finding them. In fact, some flowers even produce colors that humans are incapable of seeing!
The contrasting colors of flowers is another reason why they look so heckin’ good in photographs. A red rose stands out against a green, leafy background. And a yellow sunflower stands out perfectly against the sky above, and is still visible against the Earth tones below.
How to use Color Theory
Color theory is extremely important when photographing flowers. I’ve written about how to edit colors in Lightroom here, but if you want to find it in camera, there’s 2 steps to think about.
Step 1. Simplify the background. You can do this by blurring busy backgrounds, or making sure that it’s full of leaves.
Step 2. Look for complementary colors. If the flower is red, orange, or yellow: look for a green/blue background. If it’s blue, white, or purple: look for earth tones.
By using those two steps, you’ll have a major head start on creating beautiful flower photos. This is one reason why photographing at sunset is so beautiful. The yellow light warms up all of the colors in a scene, and simplifies the color palette. So if a photograph looks dull mid-day, try taking it again during the golden, or even blue hour. This kind of light makes a huge difference. If you’d like to know more about planning a photograph like this, I’ve got more details in this article.
If there’s a specific flower that you know you want to photograph, you can take a look at color.adobe.com to see a color wheel. This free tool is a great place to learn and practice color theory.
5.Wait for a cloudy day
One of the biggest hurdles to overcome with flower photography is lighting. It’s something that’s been mentioned a few times above, but there’s another easy tip to make images pop.
If it’s a sunny day, the flower petals will be full of bright and dark spots along the petals. When that happens, the contrast is just too much, and the images don’t work as well as they should.
Clouds diffuse the harsh sunlight, spreading it evenly across the flowers. This reduces the contrast overall and makes for some beautiful images without any bright or dark spots!
Alternatively, you can purchase a 5-in-1 reflector on Amazon. These will help you to reflect light onto the area where you want it most. Or, if you take off the covers, the white sheet works as a diffuser — just like the clouds on an overcast day.
6. Get close with a macro lens or extension tubes

Flowers contain many fascinating textures that can be highlighted by getting closer than normal lenses will allow. Leaning in and grabbing these textures will show the world scenes that they’re not normally able to see.
The best way to get in that close is to use macro lenses, which are designed to magnify images as much as possible. But if you’re just starting out in macro photography, there is a cheaper alternative available.
Extension tubes are a device that sits between the lens and the camera, and allow them to focus closer than they’d normally be able to. They cost between $20-$80, depending on the camera mount, but most do the same job. The main recommendation I have when looking for extension tubes is to purchase one that has electronic contacts, and metal mounts.
7. Use a dark background
The best way to isolate a subject is to make it the brightest part of a scene. The viewer’s eyes will always go to the brightest part of an image that has detail.
So when you want to make an image of a flower stand out, the best thing you can do is to darken the background. And there are two main ways to do that which will make incredible images. 1. Use a macro ring light flash, or 2. use a felt cloth.
The macro ring light is the choice of professionals because it allows them to use a smaller aperture when getting up close to increase the depth of field. This light sits on the front edge of your lens and illuminates the subject as evenly as possible. Because the light doesn’t travel far, you’re able to reduce the brightness of the background by increasing your shutter speed. The other benefit of using the ring light is that it’s small, portable, and doesn’t require you to bring any additional tools.
The next option is to simply use a dark cloth. It’s not as fancy, but it can create some brilliant results without having to buy expensive gear. Black felt works best because it absorbs the light evenly, and doesn’t reflect anything back. To make the felt work, have your partner or assistant hold the cloth behind the flower so that you can focus on taking the image up close.
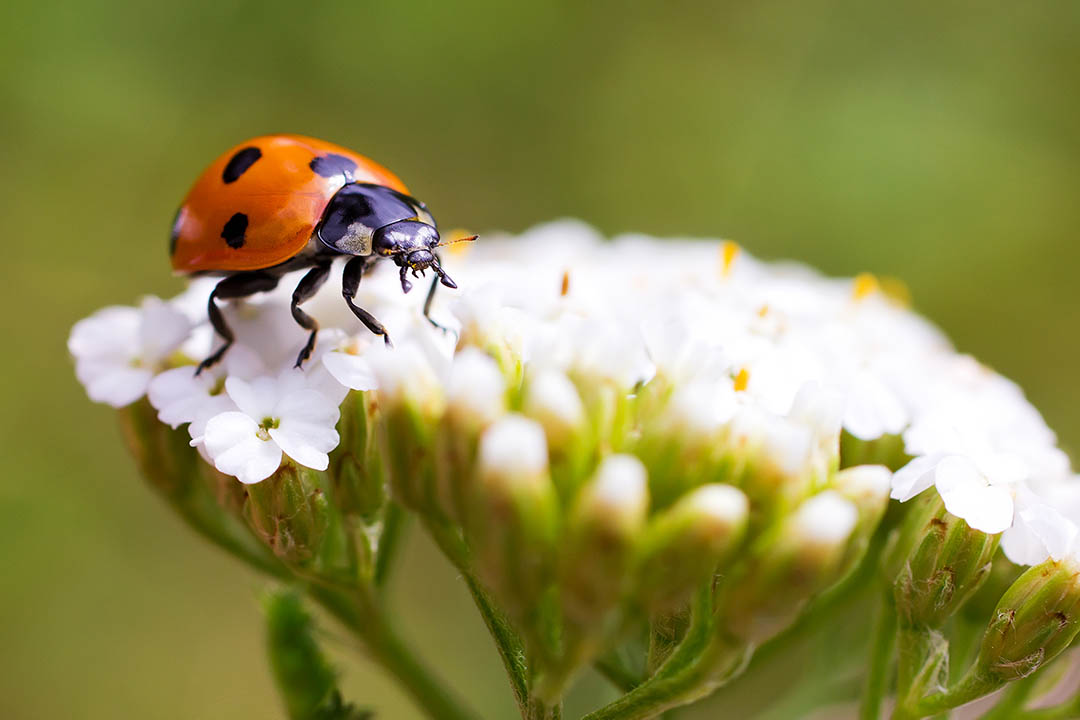
8. Photograph an insect on the flower
Having an insect such as a ladybug or a bee can add a whole new layer of interest to your image. These bugs are cute, interesting, and are also naturally attracted to flowers.
But the other benefit is that the ladybugs and bees typically have opposite colors to the flower, and can add an extra layer of color theory to the flower portrait.
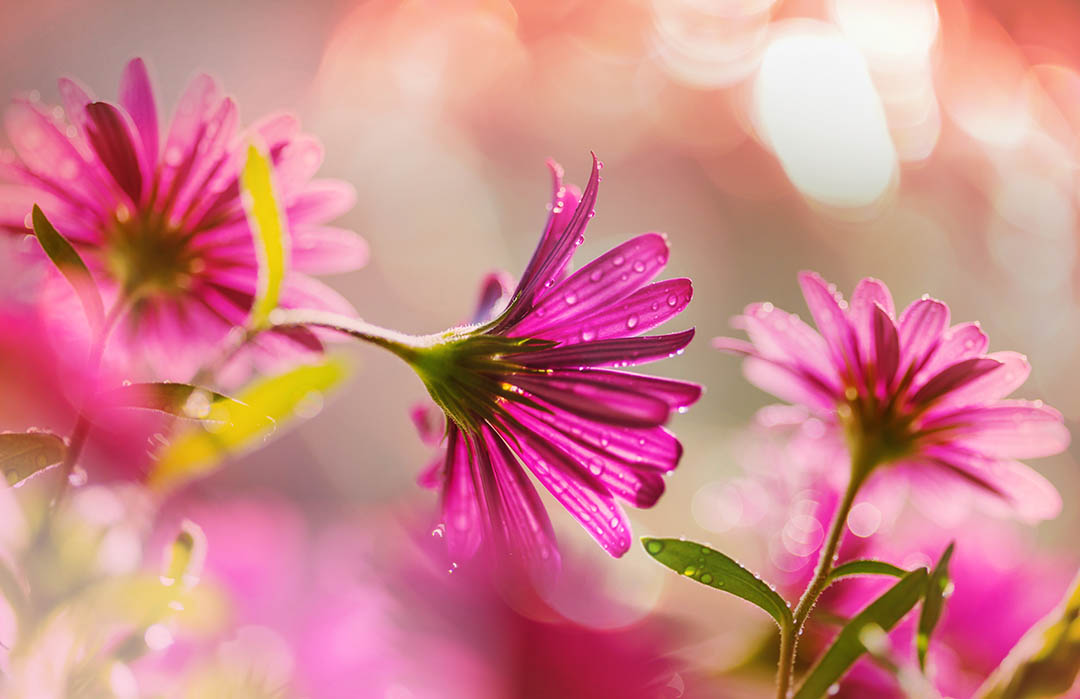
9. Use mist to add water drops
Nothing says fresh like drops of water on a leaf or petal. These water drops add texture and nuance to photos of flowers and plants. On the macro scale, water droplets can magnify textures inherent in the steps, leaves, and petals. This is a look that draws viewers in to see more.
The easiest way to take photos of flowers with water droplets on them is to wait to take photos after the rain. But if you’re taking the photos inside, or even in your backyard, simply bring a clean spray bottle filled with water and give the flowers a spritz.
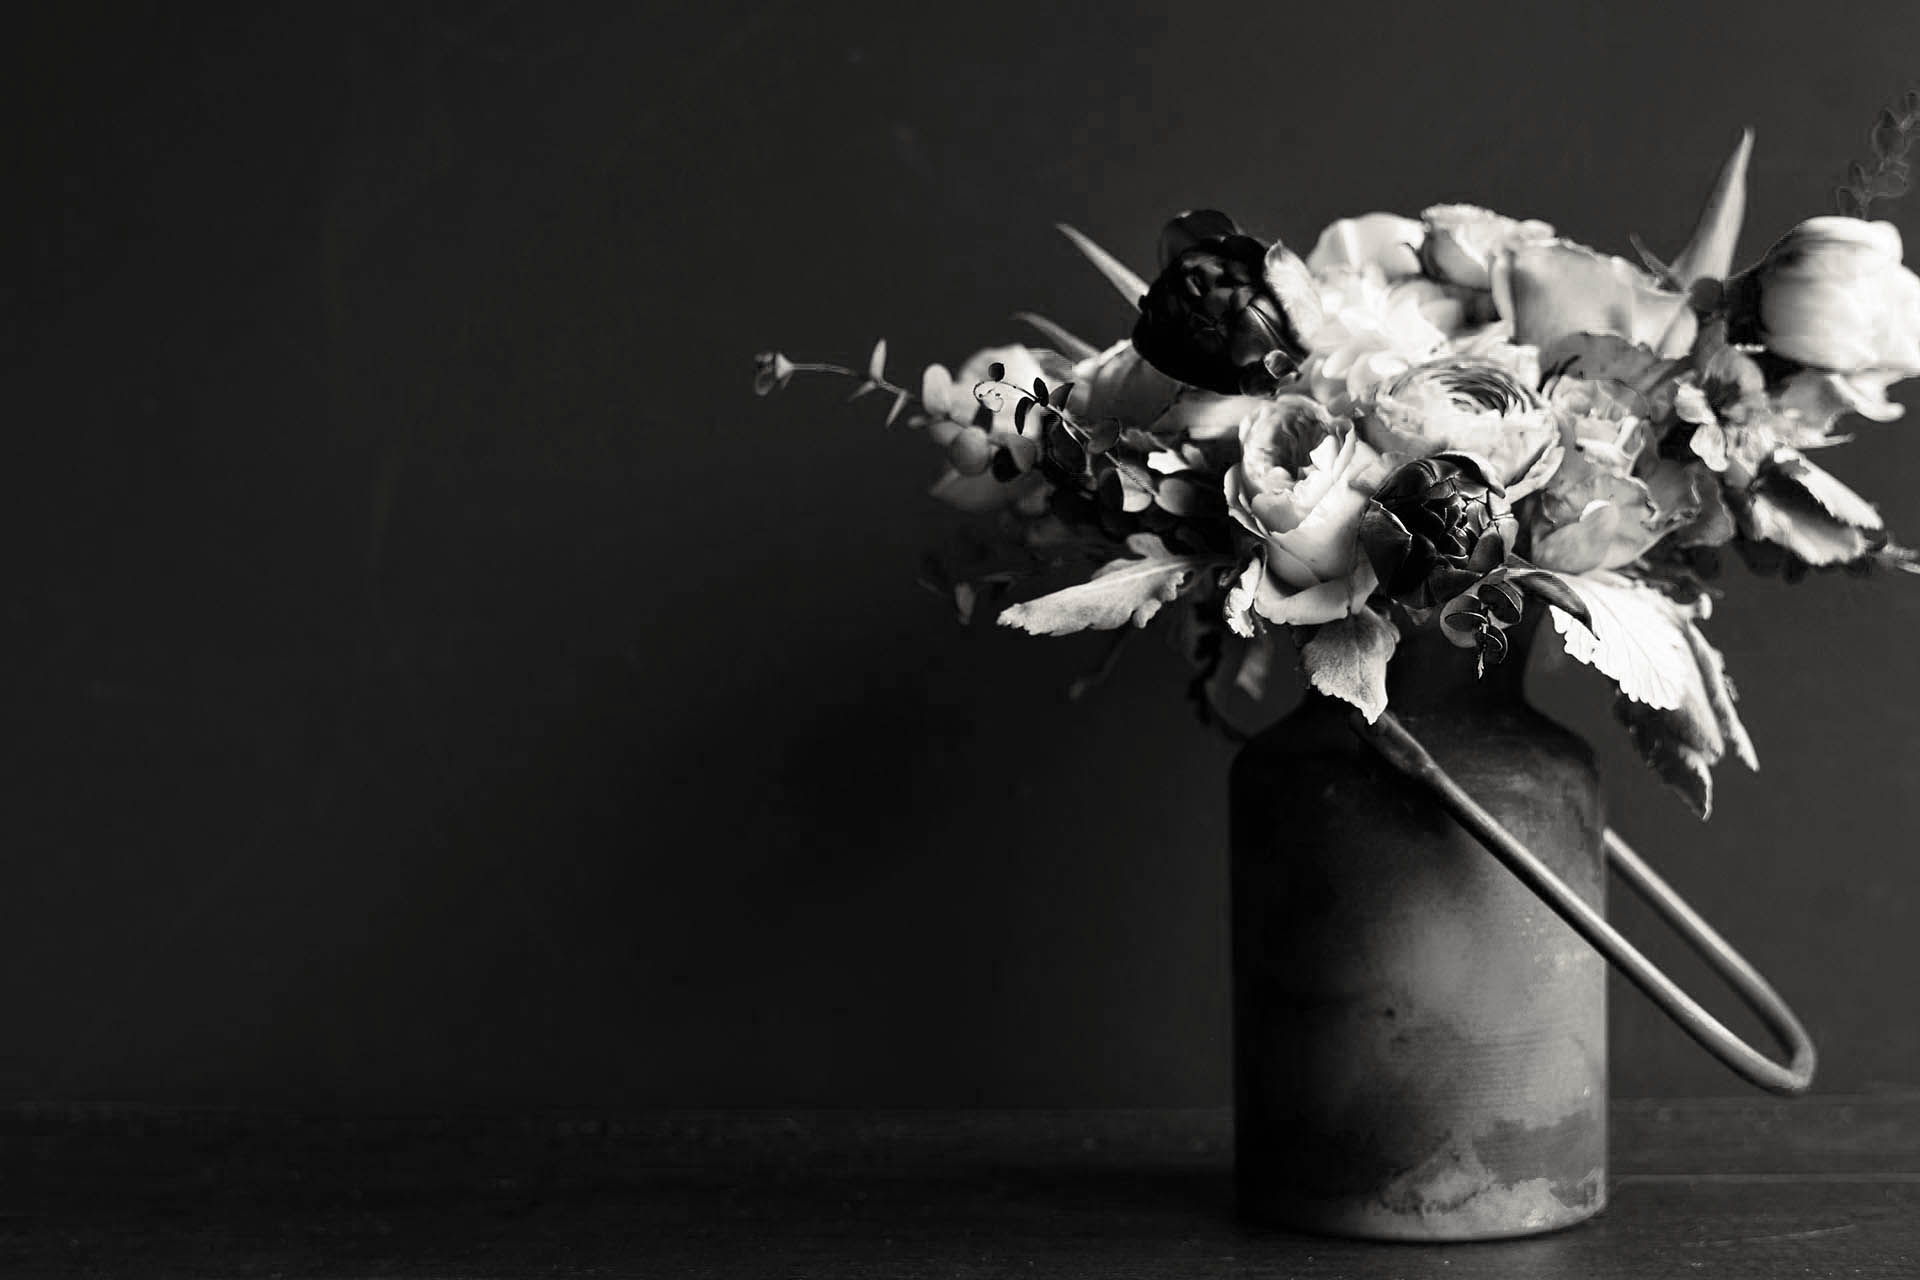

Making a good Black and White flower photo requires a different thought process.
10. Use simple compositions with high contrast for black and white
The ultimate test to flower photography is if you can make them look amazing in Black and White. Flowers create their own contrast so perfectly, but they often look dull in B&W for one key reason. They just don’t stand out against the background.
So this is the challenge. How do you make something stand out against the background without color?
This is going to use a few of the steps that I’ve outlined above. But most often, you’ll need to take the flowers out of their natural habitat. This is because the forests and bushes are just too chaotic to make a beautiful black and white flower photograph. Having just one or two flowers against a simple background with contrasting light will make all of the difference.
If you don’t have a studio, or professional lighting to take the photos, you can again use a windowsill with a blank corner. If possible, use a dark background to make the bright flower stand out. If you can take a good flower photo in Black and White, you’ll know exactly how to take an amazing photograph in color.
Where can I learn more about photography?
 Ready to learn more about photography? I have a free web class that’ll teach you the basics of how to plan for the perfect photo every time. It’s a simple, 4-step system that I use for every photograph I take. And over the years, this is the system that has helped me become an award-winning landscape photographer. Learn this system and more by signing up for my free online web class today!